elisabeth andrée

about crochet


12 Comments

crocheting a round into a square

hello and welcome!

someone asked me how she could make a square of a round motif. this because she saw the tutorial for the another crochet square, a japanese circular motif of which i made ​​a square. 

my answer was/is: alas i can not say this is THE way or this is THE recipe, because there are multiple ways. if you have a favorite round motif which you want to turn into a square and you do not know which method you find most beautiful, i think it is best to practice and try out.  

a few years ago i learned it by crocheting many patterns to understand and then i started practicing to crochet rounds into squares. this cushion cover is the result and consists of those exercises combined with some patterns of others.

more info about this cover via this link

.

links to patterns

below you’ll see a small selection of links to patterns for squares which centers are round. 

some of the patterns are more complicated than others, but while crocheting it is advisable – i think – to look at the anatomy of the squares. some are made of a combination of short and (groups) of long stitches, some patterns contain more chains to make the corners and some are a combination of both. but they all are different.

just see what you like most, then you pick a round motif – i like to use the centers of doilies – and start counting.

counting?

yes counting, because if you want to make a square or rectangle, you need four corners, right? 🙂 

therefore the number of stitches of a round motif must be divisible by four. 

so i would say grab a ball of yarn with a suitable crochet hook and give it a try. 

have fun practicing! 


  1. squaring the treble circle by magda of pigtails
  2. tiny squares by elisabeth andrée
  3. ~ a ‘squircle’ ~ by debi y. of hooks and yarns
  4. retro circles – the tutorial by adele of three beans in a pod
  5. sunny spread crochet pattern by ellen k. gormley
    (and this is the link to the diagram)
  6. pop wheel by sarah london
  7. squaring the big circle tutorial by kate of signed with an owl
  8. flower garden granny square by hiromi of harujion design
  9. chrysanthemum square by betty barnden (written and diagram)
  10. latte macchiato by drops design
  11. circle of friends square by priscilla hewitt ©1999
  12. fresco lino pillow by pierrot (gosyo co., ltd)
    a japanese diagram pattern, links via ravelry to the japanese and english version
    .
    UPDATE! i forgot these:
    .
hope to see you soon!

.


14 Comments

round rug

the round rug is ready!

round rug by elisabeth andrée

after i had used up the off white and light gray yarn the rug had the size of a large placemat. i saw it happen that a guest would pick up the thing of the floor and say, your placemat lies on the floor, where can i put it? therefore i started to crochet with the other colors of the same yarn and i have used up over 18 balls from my stash and the rug has a diameter of just over 90 cm. not very large but it is a nice size.


there is somewhat confusion caused by my complaining about the splitting yarn ‘light cotton’ of drops. the purple pouf i made of this yarn and that was fine to work with, at most, a bit stiff. then drops has renewed the yarn and created this splitting yarn. in my opinion no improvement, even though it contains more cotton.

on the left the old and on the right the new version

on the left the old and on the right the new version

tutorial

if you want to make a round rug too, you can use my tutorial, see here for part 1. increase the number of stitches until the last row. but i have a tip for you to keep the rug completely flat. if the rug is getting larger than it may happen that at the edge it gets slightly wavy. if that’s the case, then crochet one row without increasing, after that row continue again with further increase like you did.

to complete this story about my round rug here some pictures of the details, just for fun. 

until next time!


21 Comments

gray pouf cover

hurray the gray pouf cover is finished! 

gray pouf by elisabeth andree

in an earlier post about the cover i had written that i had to work with two shades of a variegated yarn, but the effect is not bad at all. the circles were created themselves while crocheting.

i have this pouf made in the same way as the yellow floor cushion, the difference is that when i was almost at the side of the pouf, i stopped increasing the number of stitches.

both parts of the pouf cover i hooked together with the wrong sides facing each other and alternately crocheted a h dc into the edge of one half and then one h dc in the other half. the last part of securing the seam was tricky because the pouf is too large to hold in a handy way and crochet at the same time. well it worked – with a lot of moaning and grumbling i must admit. if i want to wash the cover, i have to detach a part of the seam and reconnecting when washed and dried.

what you think of the end result?

 
for the tutorial for the yellow floor cusion see:
see you next time!
gray pouf by elisabeth andree
gray pouf by elisabeth andreegray pouf by elisabeth andree

 ….


 ….


7 Comments

crochet project in the making

  …

whilst i made three cushion covers and wrote the tutorial (see here), i was / am also working on a cover for a pouf.

_elisabeth_andree_-_poef_9490

i only wanted to use the variegated yarn that i started with, but i fell short and the yarn was sold out so i’ve taken the yarn that came the closest in terms of colors. now i’m over my disappointment, i think it is quite nice. the lighter shades flow slowly into slightly darker shades.

_elisabeth_andree_-_poef_9493
 …..

besides this, i also started something else and about that you can read another time. the blue diamonds blanket is waiting for me next to a bag i started last fall.


plenty to do and you?


11 Comments

crocheting rounds tutorial part 2

Img_7654

intro

  • this method (i do not pretend that i have invented it) i have tested with thicker and thinner yarn and both types of yarn create a flat circle. if you’re working with a thicker yarn then your work – i think – will remains flat too, but if not so, start the circle with 6 half double crochets instead of 8.
  • the circle can be used for making a rug, a bag or basket or like i do for a pouf and a large floor cushion.
  • this is not a pattern, but more an attempt to explain how i work when i crochet in circles.

.

the pouf  

Pouf_7440
used stitches (american english)
  • ch = chain
  • ss = slip stitch
  • sc = single crochet
  • h dc = half double crochet 
used materials 
  • drops cotton light
    60% cotton – 40% acrylic
    50 g = approx 110 m
  • crochet hook size 4 mm 
colors and amount
  • lightest color  – 6 balls
  • second color  – 3
  • third color      – 3
  • dark blue       – 3
  • black            – 3
how to start
  1. make 2 chain
  2. make 8 h dc in second chain from hook
  3. tighten loop
  4. close row with a ss in the first h dc
  5. make 1 chain
work the next rows as follows 
  • first row – 8 stitches
  • second row – 16 
  • third row – 24 – 1 stitch between the groups of two stitches
  • fourth row – 32 – 2 stitches between the groups of two stitches
  • fifth row – 40 – 3 stitches between the groups of two stitches
  • sixth row – 48 – 4 stitches between the groups of two stitches
  • and further
  • the first place you increase is into the first half double crochet of each a row by making 2 h dc in 1 h dc
  • the other places where you increase are always the first stitches of the groups of two of the previous rows (see also part 1)
  • end each row with a slip stitch in the first half double crochet
  • then make a chain
  • start the next row by crocheting 2 half double crochets into the same stitch in which you have made the slip stitch 
  • forget the chain 
  • end your work with a couple of rows without increase.
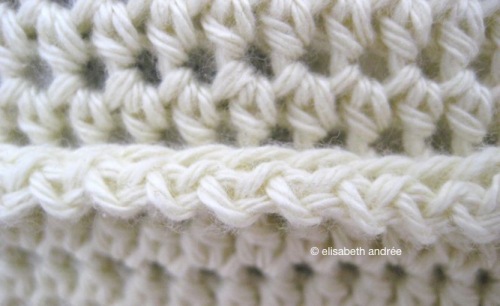
in close up the joining will look like this:
Seam_img_7590
Seam_img_7592
colors and number of stitches of the pouf
  1. for the first part crochet 35 rows in the first color, the last row of this shade has 33 stitches between the groups of 2
  2. second part in the second color: 7 rows, the last row of this shade has 40 stitches between the groups of 2
  3. third part in the third color: 7 rows, the last row of this shade has 47 stitches between the groups of 2
  4. fourth color: don’t increase but crochet three rows one stitch in each stitch of the previous row,
  5. than 1 row decrease, which is done by crocheting two h dc together on the place where you would actually increase (if you had continued to increase the last 3 rows) and 1 extra stitch back – see photo 

    Decrease_img_7640

  6.  this row creates the bend to the side of the pouf
    Bend_img_7633
  7. after this row crochet 3 other rows with one stitch in each stitch
  8. fifth color: 7 rows one stitch in each stitch of the previous row
  9. make the other side of the pouf in the same manner
  10. my pouf has a diameter of about 72 cm and is about 14 cm high.

.

filling and buttons
Img_7647

the two parts of the pouf i finished. what i have to do next is crochet the two parts together, make a part with buttonholes and sewing on the buttons. i ordered bean bag filling (polystyrene) and after sewing an inner cushion, i can fill it and put it into the pouf. that is what i am working on.

the result i post another time.

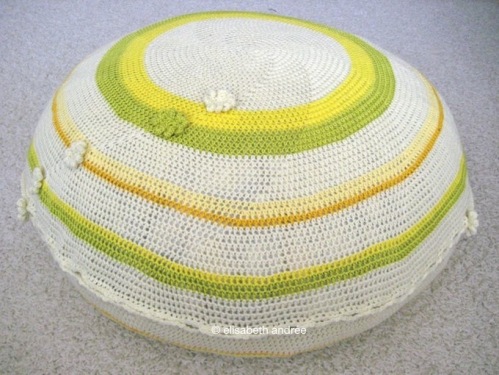
yellow floor cushion

Gele_poef_img_7905
used materials

for the large yellow floor cushion i have used regular and mercerized cotton from my stash. both yarns are suitable for hook size 2.5 to 3.5 mm, i used hook size 4 mm. as a result, the cover is quite stretchable.

size

if you like to make a similar pillow, just follow the same method of making rows and increasing until the cushion has the size you like. i did 47 rows, but this time i did not crochet rows without increase or rows in which i have decreased the number of stitches. the cushion cover has a diameter of about 67 cm.

attaching

with the wrongs sides facing each other, i have both parts crocheted together with a row of half double crochets, but i have left a space large enough for a pillow to put through. along one edge of the opening i also made a row of half double crochets.

button holes
Img_7644
Img_7898
Img_7904
  • on the other side of the opening i made ​​button holes by alternating half double crochets with chains and skipping two stitches. this you need to divide equally.
  • i started with 2 h dc, *2 ch, skip 2 stitches, 4 h dc* repeat between * * and ended with 2 h dc. 
edge
then i crocheted along all edges of the cover alternate 1 ch, 1 ss in every stitch and then tied off. and i have sewn the buttons on.
Img_7895
Img_7659
stuffing
first i wanted to fill the cushion with the stuffing of a spare pillow that i had in the closet and to make a lining, but i finally decided to buy a ready made one. because of the model my floor cushion has therefore more the shape of a pouf. i do not know whether i love it. another possibility to fill the floor cushion is cutting circles out of an old duvet. time will tell.
 

the gerry flower

the cushion cover i have embellished with a few gerry flowers. the tutorial for these flowers you will find in a separate post very soon.
Img_7901
Flower_img_7887
Img_7902
UPDATE!

.

my floor cushion is ready!
for more info about crocheting rounds/circles: see also part 1 of the tutorial
Gele_poef_img_7880
Gele_poef_img_7884
Img_7907
Img_7908
Img_7892
.