tutorial part 1
- intro
- increase: how and where
- changing colors: methods
.
UPDATE!
part 2 of the tutorial is ready too, see here
intro
crocheting in rounds shows to be intriguing for many crocheters. there are many patterns for round bags, pillows, rugs and much more. a number of patterns can be found on my pinterest boards, but it are not patterns i’ve tried.
for a while i wanted to make a pouf and i insisted on working with half double crochets. first i started with a magic ring and 12 stitches and then increase as you normally would, but the result was very bumpy. if i had pulled it over football, it would still not become smooth.
then i started with two chains with the first h dc in the second chain from the hook and from that moment it went very well.
increase: how
- to create a nice round product it is necessary that you evenly increase the number of stitches. i do it the way like everyone else – i guess, but i venture an attempt to tell you.
- if you start with 12 stitches you increase every subsequent row with 12 stitches, when you start with 8 stitches you increase every subsequent row with 8 stitches.
- increasing the number of stitches is done at the indicated places by crocheting two stitches, instead of one, in one stitch of the previous row. so you make on multiple places in a row groups of two stitches. because you increase the number of stitches, you create each row more stitches between the groups of two.
you do not need a complex scheme, it is as follows: you start with 8 stitches and you increase every row with 8 stitches.
- first row – 8 stitches
- second row – 16
- third row – 24 – 1 stitch between the groups of two stitches
- fourth row – 32 – 2 stitches between the groups of two stitches
- fifth row – 40 – 3 stitches between the groups of two stitches
- sixth row – 48 – 4 stitches between the groups of two stitches
- and so it goes.
.
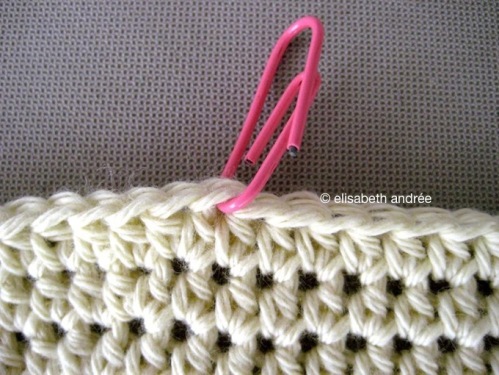
i always count the number of stitches between the pairs very carefully until the point there are 12 stitches between the pairs. then the base is good and if i’m afraid to forget to multiply on time, i mark the places with paper clips.
increase: where
- end each row with a slip stitch in the first half double crochet
- then make a chain
- start the next row by crocheting 2 half double crochets into the same stitch in which you have made the slip stitch
- forget the chain
- work not too loosely, then there occurs a neat joining.
- so, the first place you increase is into the first half double crochet of each a row
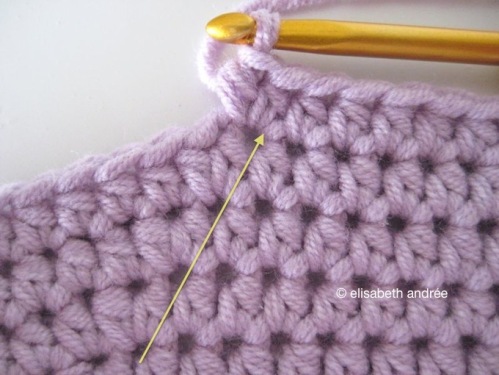
- the other places where you increase are always the first stitches of the groups of two of the previous rows. if you do it that way you create that beautiful swirl
- see the yellow and blue lines on the pictures.
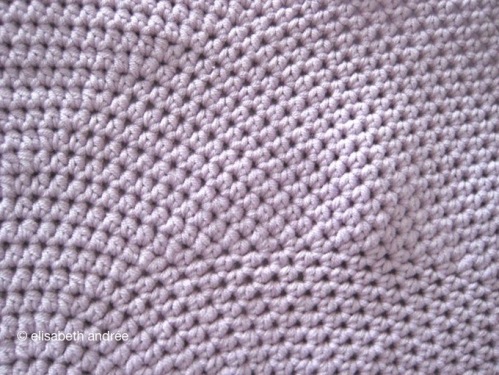
- if you continue to increase this way your work will be beautiful round and if not, without any ado you can bring it into shape
- after the rows in which you decrease the number of stitches it is advisable to crochet some rows without increase, so one stitch in each stitch of the previous row.
.
changing colors: methods
if you want to change colors then i would recommend the method of sarah london, here is the link to her beautiful tutorial: seamless + symmetrical
of course there are more ways, but i think this is a very good method and you can use it when you make circles and squares. sarah advises to work this way each row, even if you are not changing colors, but for me that’s a bit too much.
changing colors: in this pattern
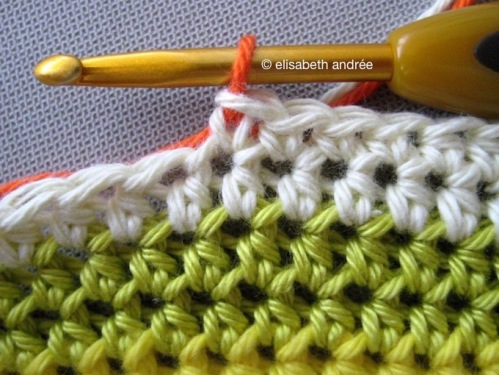
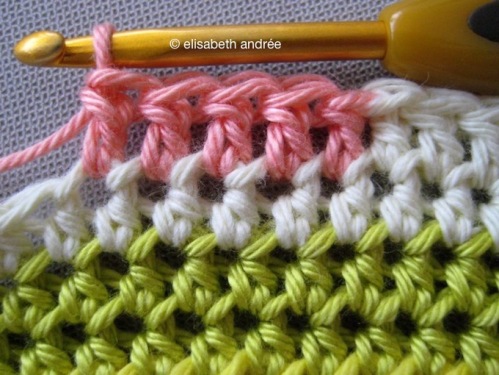
every row you end with a slip stitch to the first stitch and then you would make a chain but in stead of making a chain, you pull the new color yarn through the loop and then make the two half double crochets in the same stitch as the slip stitch.
the round yellow floor cushion i made with a too large crochet hook and therefore i could not make the color changes as neat as i wanted, because for that you need to work tight.
a brief explanation for changing colors in the middle of a row
for who wants to see it one more time: don’t finish the last stitch but you pull the new color yarn through the last 2 loops on your hook and for the half double crochets through three loops. it is the same way as when you attach a new ball of yarn.
changing colors half double crochets
changing colors single crochets
changing colors double crochets
for every method: probably needless to say but it is important to weave in all the ends neatly, so the different colors won’t show between the stitches.
that’s it for today, part two will follow soon. hope to see you again!
UPDATE!
part 2 of the tutorial is ready, see here: crocheting-rounds-tutorial part 2








April 19, 2012 at 07:33
What a great tutorial – thanks for sharing
April 18, 2012 at 22:09
It’s a neat looking stitch…or pattern
April 18, 2012 at 16:29
I’m not a crocheter, but this is very fascinating! The finished fabric your technique produces is beautiful!
April 18, 2012 at 13:23
Oh wow, those are beautiful. When I have practised a bit on my crochet skills I will definitely be back to try this tutorial out. Thanks for sharing :-Dx
April 18, 2012 at 12:18
Lovely crochet and great clear pictures! I’m sure this will be very helpful to many people.
April 17, 2012 at 15:23
Wauw, dit zijn wel heel erg mooie ‘rondjes’!! Indrukwekkend!!
April 17, 2012 at 11:02
These are beautiful!!
April 17, 2012 at 02:56
The circles look amazing! Thanks for linking to a Round Tuit!Hope you have a fabulous week!Jill @ Creating my way to Success http://www.jembellish.blogspot.com/
April 15, 2012 at 08:37
Goh, dat moet nogal een werk zijn om zo’n tutorial ineen te steken! Ziet er goed uit, ik krijg meteen zin om het ook es te proberen.Bedankt trouwens voor je lieve complimentjes! Groetjes,Joke
April 14, 2012 at 22:27
Just wonderful Andree! Great tutorial – you’ve brought it all back to me 🙂 I made some flat round cushions a couple of years ago now and just found them the other day. They are fun, aren’t they? Have a great weekend! Kx
April 14, 2012 at 20:12
Good to have you back Elisabeth!Great tutorial and lovely work you have in hands :)Have a great weekend, Paula
April 14, 2012 at 19:17
Those look amazing! Love the colors and the pattern doesn’t seem to be very hard to figure it out! thank you for sharing !