elisabeth andrée

about crochet


12 Comments

bag & vest

good to see you again!

it’s a bit of a lukewarm time here on my blog, but of course i crochet and luckily i have some photo’s to share with you.

a short while ago i showed you the pictures of peachy colored blocks and some black. that black is the winter version of my square bag. not that the summer version is ready … i understand that that is called a PhD, project half done:) 

square bag

with the winter version, i am already well progressed. i’ll line the bag with cotton bags that i got -years ago- at a shop of cora kemperman, a dutch fashion designer.

Img_6419
Img_6407 Img_6417 

vest

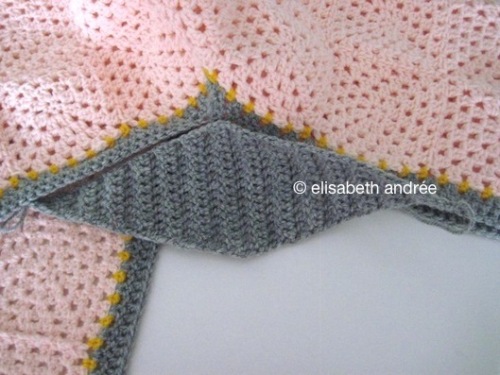
the peach-colored squares form a vest and i have crochet an orangey border around it, while the sides are medium gray. for the sections under the arms i have crocheted diamond shapes in the same shade of gray. after i have attached them, i can work on the lower ends of the sleeves and the vest. it’s a bit puzzling, but i want to bring it to a good result.

to be continued…
hope you have a great week!
Img_6414


27 Comments

scarf – buttons – sleeves

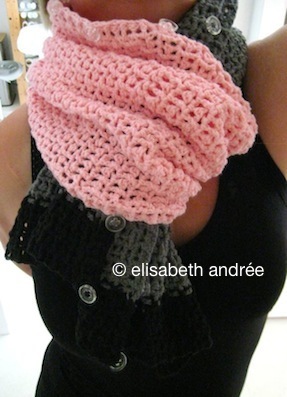
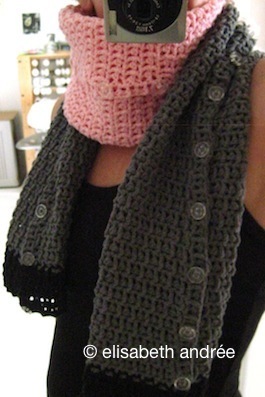
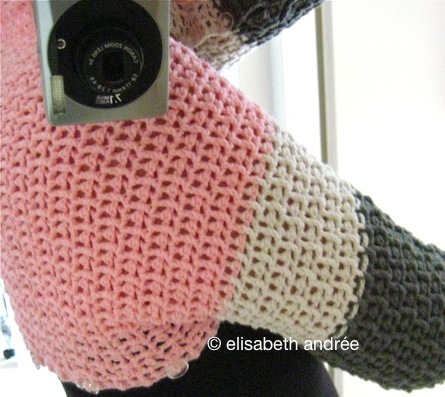
for a long time i wanted something made of black and pink yarn, for some reason an exciting combination. now proved to be too exciting for me because i have combined it with a very light and a dark shade of gray. the sleeves are fitting great and because they are a bit too long, i can hide my hands in the cuffs when i am cold.

i found it very difficult to properly describe how i crocheted it. hopefully the pattern is clearly enough.


scarf

scarf-buttons-sleeves by elisabeth andrée

buttons

scarf-buttons-sleeves by elisabeth andrée

sleeves

scarf-buttons-sleeves by elisabeth andrée

used materials

softfun – scheepjes -ca. 140m/50gr – 60% cotton/40% acrylic

  • pink – 3 balls
  • dark gray – 4 balls
  • very light gray – 1 ball
  • black – 1 ball
  • 30 transparant plastic buttons with 4 holes
  • crochet hook size 3.5 mm
  • needle with a blunt point

for this pattern you can use any yarn you like, if it is thicker or thinner than my yarn, only adjust the number of stitches.

used stithes (american terms)
  • ch – chain
  • ss – slip stitch
  • dc – double crochet
  • bpdc – back post double crochet
  • fpdc – front post double crochet

pattern & notes

this is how i have made it. 

the basis is 21 stitches (16 + 5 chain) with a multiple of two. i started with 79 chain and made the first dc in the seventh chain from hook. from here you can follow the diagram, but first some pattern notes.

  • from row 2, i replaced the first dc not by 3 but 2 chains
  • rows 1, 3, 5 and further (the odd rows) are on the wrong side, these are the rows of dc’s and chains
  • rows 2, 4, 6 and further (the even rows) are on the right side, these are the rows with the post stitches – bpdc and fpdc – and chains. these rows always begin with a fpdc right after the turning chains
  • i suggest you mark the right side with a piece of contrasting color yarn
  • you can choose to use one or several colors to work with, like i did. i first made ​​one half until it was long enough, measured from my spine to my hand. when that part is long enough finish with a row with post stitches and weave in all ends
  • attach the yarn to the beginning chains on the right side and crochet a row with post stitches
  • make the second part the same way as the first part, end with a row of post stitches and chains.
scarf-buttons-sleeves by elisabeth andrée

the edge

attach the yarn on the wrong side at a long side of your scarf and start with 3 ch, then you crochet 1 dc in the space of the first dc, 1 ch, 1 dc in the space of the next dc, repeat this until you reach the end of this side, 3 ch and turn. crochet a row of post stitches and chains till end of row. fasten off.

repeat these 2 rows on the other long side of your scarf.

note to row 1: the spaces between 2 dc’s serve as buttonholes.

finishing touches

weave in all ends of yarn and sew buttons down one long side and then you’re done.

scarf-buttons-sleeves by elisabeth andréescarf-buttons-sleeves by elisabeth andrée


options to wear

scarf-buttons-sleeves by elisabeth andréescarf-buttons-sleeves by elisabeth andrée

scarf-buttons-sleeves by elisabeth andrée

hope you like the concept of this scarf-button-sleeves!
have fun with it!

scarf-buttons-sleeves by elisabeth andrée


more about bpdc and fpdc:


5 Comments

happy sleeves – tutorial – part 2

happy-sleeves by elisabeth andrée

let’s continue with the happy sleeves. you missed part 1? 

cuffs

fold the two sleeves in half lengthwise and with the right side up and the last row on the top, it looks like this.

happy-sleeves by elisabeth andrée
you can now see and mark where you going to make the cuffs.

cuff first sleeve

attach yarn to the wrong side of the sleeve in the first space (= tr)
row 1. 2 ch (= sc and 1 ch), 1 sc in first space (same space), *1 ch, 1 sc in cluster stitch, 1 ch, 1 sc in space*, repeat between * * till end of row end with 1 sc in cluster stitch, 2 ch, turn


row 2. is the same as row 2 of the pattern for the sleeves (the cluster stitches), ch 3, turn

row 3. 1 h dc between first and next cluster stitches, *1 ch, 1 h dc between next cluster stitches*, repeat between * * till end of row, end with 1 h dc in last cluster stitch

repeat rows 2 and 3 until you have the desired width end with row 2

cuff second sleeve

repeat this for the other cuff only you start row 1 in the first cluster stitch

the back part

the back you make in two parts
  • attach your yarn the same way as you did for your cuffs, but on the other side of the sleeves.
  • row 1. is simular to row 1 for the cuffs
  • row 2 and further rows are the same as the pattern for the sleeves.
  • crochet both sides halfway you back
  • pin sleeves and back to see if it all fits well and adjust if necessary
  • finish and fasten off
the seams of the sleeves and back side
  • fold the sleeves in half lengthwise with wrong side up
  • crochet the corresponding stitches together with a sc and make 1 chain between them
  • make sure you close your sleeves not too far up because that will be uncomfortably under your arms
  • occasionally put on the sleeves to see you still should continue seaming. crocheting the edge makes the sleeves tighter also
  • seam the back also on the wrong side

edge

the edge all around you make by crocheting sc evenly spread. sometimes you make two stitches in a space, sometimes one. 
and in the part under your armpit you crochet together three stitches.
i have crocheted three rows and the last two rows, i worked in the back loops only.
i hope the tutorial is clear enough and that you now have a garment that you like to wear.
happy-sleeves by elisabeth andrée
see also:


10 Comments

happy sleeves – tutorial – part 1

hello here i am again.
happy-sleeves by elisabeth andrée
this tutorial is much and much larger than i previously had thought, so again you have to do with a pattern in several parts. hopefully it’s not a too big problem for you?
winter 

last winter i often worn two things especially against the cold, whether i was working at my computer or i was reading in bed. i call them my happy sleeves.

​these almost clownish sleeves i most often worn.

the other sleeves i made ​​of squares with a collar and a border all around it and with wide cuffs. because the type of yarn you can not clearly see that it is made of squares.

a summer version of the happy sleeves

i decided to create new sleeves to crochet and to write the pattern down for you. i hope you like it but please do not expect haute couture;)

notes
  • first decide whether you want long or short sleeves. with long sleeves you measure from wrist to wrist (this is your total length of your back, shoulders and both arms), i wanted three-quarter sleeves, but you can also make yours shorter. 
  • i’ve written this pattern for three-quarter sleeves but you can customize it yourself.
  • decide the width you want, the width must leave you enough space for your armpits and upper arms (it must be wearing comfortable, you don’t want it to be stuck under your armpits and it’s nice when you just can move your arms).
  • you crochet the sleeves in the length and not the width. first you make both sleeves and then the back in two parts.
used materials

5 balls softfun – scheepjeswol – 140 m – 50 g 
my color is a pale olive green 
hook size 3,5 – 4 mm (i used 4)

used stitches (american terms)

ch, ss, sc, dc, tr
and a stitch which i do not know whether that has a name, i describe it later in the pattern and you can see pictures of it.

happy-sleeves by elisabeth andrée

this is the scheme for the first row and it is your guideline to calculate how much chains you need for your size. you increase the number of chains per 2. 

my sizes
  • length sleeve without cuff: about 35 cm
  • length sleeve with cuff: about 41 cm
  • width sleeve, sewn: about 16 cm
  • back from shoulder to shoulder: about 41 cm
  • back height with edge: about 33 cm

pattern

first sleeve

84 chain + 3 ch for beginning tr (for the beginning tr you should start with 4 ch but i like to crochet 1 chain less, please feel free to do what you normally do).

row 1. 1 tr in 7th ch from hook, *1 ch, sk 1 ch, 1 tr in next ch*, repeat between * * till end of row, 2 ch, turn

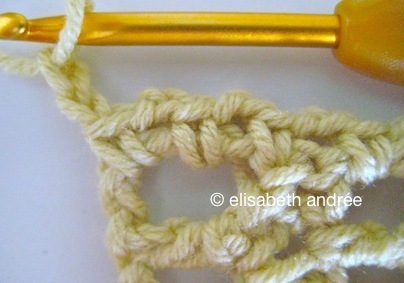
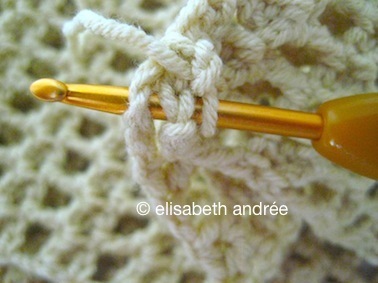
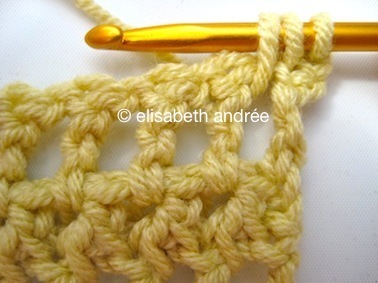
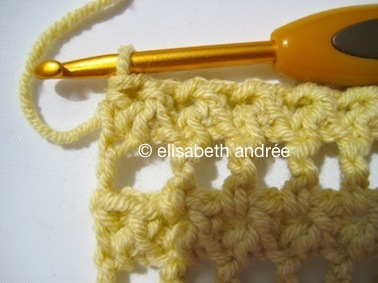
row 2. please use the photo’s as your guideline, they are more likely clearer than my text. 
insert your hook in the first tr of the previous row and draw up a loop, insert your hook in ch 1 space and draw up a loop, insert your hook in the next tr and draw up a loop, (yo and draw through 2 lps on hook) 3 times, ch 1, *insert your hook in next tr and draw up a loop, insert your hook in next ch 1 space and draw up a loop, insert your hook in next tr and draw up a loop, (yo and draw through 2 lps on hook) 3 times, ch 1*, repeat between * * until end of row, the last loop you draw up through the beginning ch (see photo), 3 ch, turn.

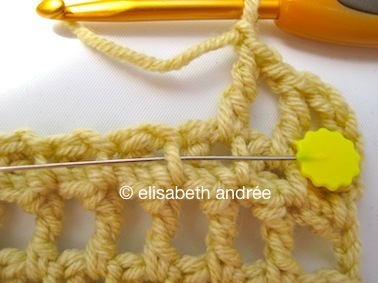
row 3. 4 ch (= first tr and 1 ch), 1 tr in next tr, *1 ch, 1 tr in next tr*, repeat between * * until end of row, ch 2, turn.

repeat rows 2 and 3 until you have the size you need, end with row 2. 

fasten off.

photo’s row 2
photo’s and notes row 3

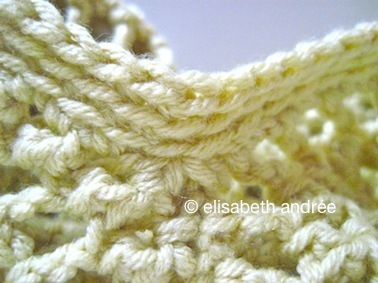
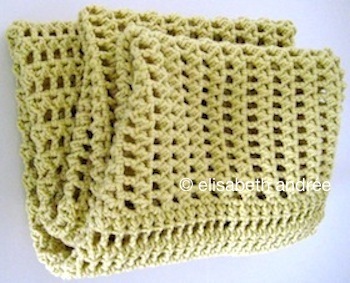
on the photo’s you can see how the wrong side looks like. you have several threads, the pins show you where to insert your hook to make the next treble.

second sleeve

just repeat the pattern to make your other sleeve.

part 2

in the next post we continue with the cuff, the back and how to put together the sleeves. see you then!

have a very good week!

UPDATE!
part 2 of the tutorial is available via this link