elisabeth andrée

about crochet


11 Comments

crocheting rounds tutorial part 2

Img_7654

intro

  • this method (i do not pretend that i have invented it) i have tested with thicker and thinner yarn and both types of yarn create a flat circle. if you’re working with a thicker yarn then your work – i think – will remains flat too, but if not so, start the circle with 6 half double crochets instead of 8.
  • the circle can be used for making a rug, a bag or basket or like i do for a pouf and a large floor cushion.
  • this is not a pattern, but more an attempt to explain how i work when i crochet in circles.

.

the pouf  

Pouf_7440
used stitches (american english)
  • ch = chain
  • ss = slip stitch
  • sc = single crochet
  • h dc = half double crochet 
used materials 
  • drops cotton light
    60% cotton – 40% acrylic
    50 g = approx 110 m
  • crochet hook size 4 mm 
colors and amount
  • lightest color  – 6 balls
  • second color  – 3
  • third color      – 3
  • dark blue       – 3
  • black            – 3
how to start
  1. make 2 chain
  2. make 8 h dc in second chain from hook
  3. tighten loop
  4. close row with a ss in the first h dc
  5. make 1 chain
work the next rows as follows 
  • first row – 8 stitches
  • second row – 16 
  • third row – 24 – 1 stitch between the groups of two stitches
  • fourth row – 32 – 2 stitches between the groups of two stitches
  • fifth row – 40 – 3 stitches between the groups of two stitches
  • sixth row – 48 – 4 stitches between the groups of two stitches
  • and further
  • the first place you increase is into the first half double crochet of each a row by making 2 h dc in 1 h dc
  • the other places where you increase are always the first stitches of the groups of two of the previous rows (see also part 1)
  • end each row with a slip stitch in the first half double crochet
  • then make a chain
  • start the next row by crocheting 2 half double crochets into the same stitch in which you have made the slip stitch 
  • forget the chain 
  • end your work with a couple of rows without increase.
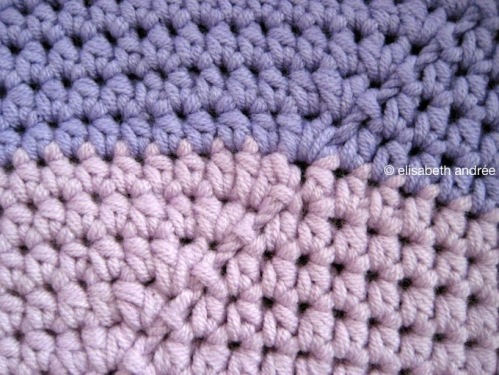
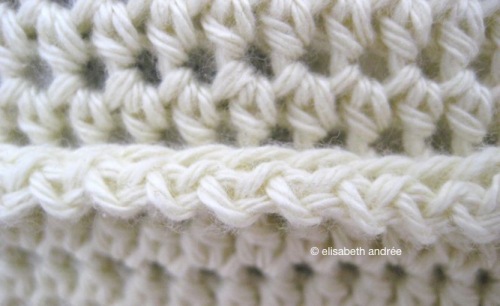
in close up the joining will look like this:
Seam_img_7590
Seam_img_7592
colors and number of stitches of the pouf
  1. for the first part crochet 35 rows in the first color, the last row of this shade has 33 stitches between the groups of 2
  2. second part in the second color: 7 rows, the last row of this shade has 40 stitches between the groups of 2
  3. third part in the third color: 7 rows, the last row of this shade has 47 stitches between the groups of 2
  4. fourth color: don’t increase but crochet three rows one stitch in each stitch of the previous row,
  5. than 1 row decrease, which is done by crocheting two h dc together on the place where you would actually increase (if you had continued to increase the last 3 rows) and 1 extra stitch back – see photo 

    Decrease_img_7640

  6.  this row creates the bend to the side of the pouf
    Bend_img_7633
  7. after this row crochet 3 other rows with one stitch in each stitch
  8. fifth color: 7 rows one stitch in each stitch of the previous row
  9. make the other side of the pouf in the same manner
  10. my pouf has a diameter of about 72 cm and is about 14 cm high.

.

filling and buttons
Img_7647

the two parts of the pouf i finished. what i have to do next is crochet the two parts together, make a part with buttonholes and sewing on the buttons. i ordered bean bag filling (polystyrene) and after sewing an inner cushion, i can fill it and put it into the pouf. that is what i am working on.

the result i post another time.

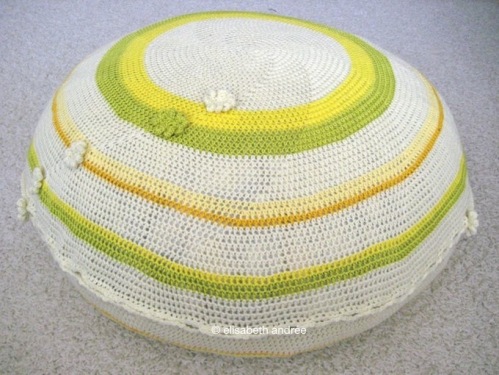
yellow floor cushion

Gele_poef_img_7905
used materials

for the large yellow floor cushion i have used regular and mercerized cotton from my stash. both yarns are suitable for hook size 2.5 to 3.5 mm, i used hook size 4 mm. as a result, the cover is quite stretchable.

size

if you like to make a similar pillow, just follow the same method of making rows and increasing until the cushion has the size you like. i did 47 rows, but this time i did not crochet rows without increase or rows in which i have decreased the number of stitches. the cushion cover has a diameter of about 67 cm.

attaching

with the wrongs sides facing each other, i have both parts crocheted together with a row of half double crochets, but i have left a space large enough for a pillow to put through. along one edge of the opening i also made a row of half double crochets.

button holes
Img_7644
Img_7898
Img_7904
  • on the other side of the opening i made ​​button holes by alternating half double crochets with chains and skipping two stitches. this you need to divide equally.
  • i started with 2 h dc, *2 ch, skip 2 stitches, 4 h dc* repeat between * * and ended with 2 h dc. 
edge
then i crocheted along all edges of the cover alternate 1 ch, 1 ss in every stitch and then tied off. and i have sewn the buttons on.
Img_7895
Img_7659
stuffing
first i wanted to fill the cushion with the stuffing of a spare pillow that i had in the closet and to make a lining, but i finally decided to buy a ready made one. because of the model my floor cushion has therefore more the shape of a pouf. i do not know whether i love it. another possibility to fill the floor cushion is cutting circles out of an old duvet. time will tell.
 

the gerry flower

the cushion cover i have embellished with a few gerry flowers. the tutorial for these flowers you will find in a separate post very soon.
Img_7901
Flower_img_7887
Img_7902
UPDATE!

.

my floor cushion is ready!
for more info about crocheting rounds/circles: see also part 1 of the tutorial
Gele_poef_img_7880
Gele_poef_img_7884
Img_7907
Img_7908
Img_7892
.


12 Comments

crocheting rounds tutorial part 1

Img_7657
.
you have asked me questions about crocheting in circles, how i created that beautiful swirl, how my work remains flat, how i change colors when crocheting something round and more….
although i’m not sure i can add something to all the wonderful tutorials on these subjects already available on the internet, i’m going to try…. in my own way. 
all in all it’s become a long story, so i post it in two parts.
.

tutorial part 1

  • intro
  • increase: how and where
  • changing colors: methods

.

UPDATE!

part 2 of the tutorial is ready too, see here

intro

crocheting in rounds shows to be intriguing for many crocheters. there are many patterns for round bags, pillows, rugs and much more. a number of patterns can be found on my pinterest boards, but it are not patterns i’ve tried.

for a while i wanted to make a pouf and i insisted on working with half double crochets. first i started with a magic ring and 12 stitches and then increase as you normally would, but the result was very bumpy. if i had pulled it over football, it would still not become smooth.

then i started with two chains with the first h dc in the second chain from the hook and from that moment it went very well.  

increase: how
  • to create a nice round product it is necessary that you evenly increase the number of stitches. i do it the way like everyone else – i guess, but i venture an attempt to tell you. 
  • if you start with 12 stitches you increase every subsequent row with 12 stitches, when you start with 8 stitches you increase every subsequent row with 8 stitches. 
  • increasing the number of stitches is done at the indicated places by crocheting two stitches, instead of one, in one stitch of the previous row. so you make on multiple places in a row groups of two stitches. because you increase the number of stitches, you create each row more stitches between the groups of two. 
you do not need a complex scheme, it is as follows: you start with 8 stitches and you increase every row with 8 stitches.
  1. first row – 8 stitches
  2. second row – 16 
  3. third row – 24 – 1 stitch between the groups of two stitches
  4. fourth row – 32 – 2 stitches between the groups of two stitches
  5. fifth row – 40 – 3 stitches between the groups of two stitches
  6. sixth row – 48 – 4 stitches between the groups of two stitches
  7. and so it goes.

.

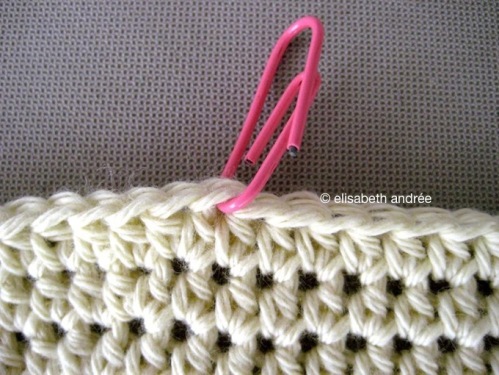
i always count the number of stitches between the pairs very carefully until the point there are 12 stitches between the pairs. then the base is good and if i’m afraid to forget to multiply on time, i mark the places with paper clips.

Paperclip_img_7518
increase: where
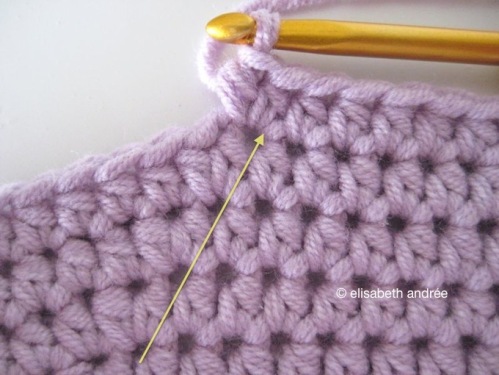
  • end each row with a slip stitch in the first half double crochet
  • then make a chain
  • start the next row by crocheting 2 half double crochets into the same stitch in which you have made the slip stitch
  • forget the chain
  • work not too loosely, then there occurs a neat joining.
  • so, the first place you increase is into the first half double crochet of each a row
  • the other places where you increase are always the first stitches of the groups of two of the previous rows. if you do it that way you create that beautiful swirl 
  • see the yellow and blue lines on the pictures.
Ipouf_7425
Img_7496
Img_7426
Pouf_7429
  • if you continue to increase this way your work will be beautiful round and if not, without any ado you can bring it into shape 
  • after the rows in which you decrease the number of stitches it is advisable to crochet some rows without increase, so one stitch in each stitch of the previous row.

.

changing colors: methods

if you want to change colors then i would recommend the method of sarah london, here is the link to her beautiful tutorial: seamless + symmetrical 

of course there are more ways, but i think this is a very good method and you can use it when you make circles and squares. sarah advises to work this way each row, even if you are not changing colors, but for me that’s a bit too much.

changing colors: in this pattern

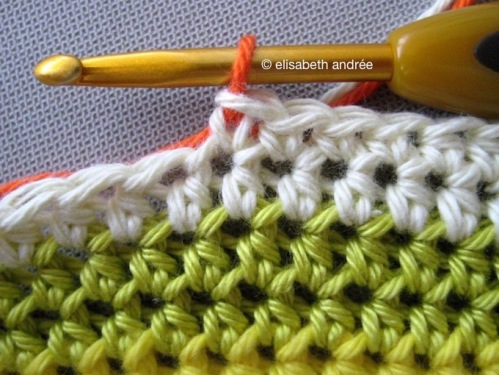
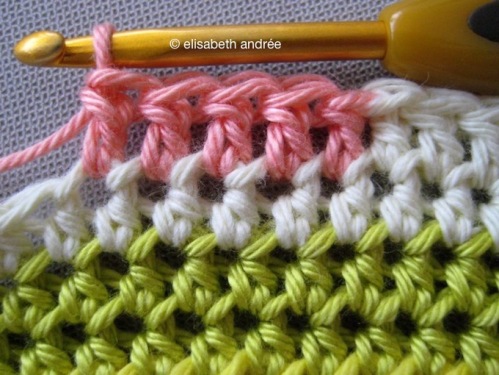
every row you end with a slip stitch to the first stitch and then you would make a chain but in stead of making a chain, you pull the new color yarn through the loop and then make the two half double crochets in the same stitch as the slip stitch.

the round yellow floor cushion i made with a too large crochet hook and therefore i could not make the color changes as neat as i wanted, because for that you need to work tight.

Seam_img_7597
a brief explanation for changing colors in the middle of a row

for who wants to see it one more time: don’t finish the last stitch but you pull the new color yarn through the last 2 loops on your hook and for the half double crochets through three loops. it is the same way as when you attach a new ball of yarn. 

changing colors half double crochets
Hdc_img_7524
Hdc_img_7528
Hdc_img_7532
Hdc_img_7533
Hdc_img_7538
 .
changing colors single crochets
Sc_img_7539
Sc_img_7545
Sc_img_7549
changing colors double crochets
Dc_img_7551
Dcimg_7554
Dcimg_7557
for every method: probably needless to say but it is important to weave in all the ends neatly, so the different colors won’t show between the stitches.
Img_7660
that’s it for today, part two will follow soon. hope to see you again!


UPDATE!

part 2 of the tutorial is ready, see here: crocheting-rounds-tutorial part 2


5 Comments

round crochet project

my intention not to buy new yarn lies in the trash can 😦

last week i was looking for yarn for someone else and then i saw an offer for drops cotton light. yarn that is just right for my new project. the temptation was too great, so i bought these colors: light lilac, lavender and purple, (besides a few other colors). the dark blue and black yarn i had bought last year.

Img_7421


i do not know for sure if i’m going to use the blue color, it depends whether i can create the desired size. what it will be? i’ll tell you next week.

Img_7420

hope you will have a good weekend!