elisabeth andrée

about crochet


19 Comments

crochet nutty pillow done!

it’s friday and i hope you will enjoy the weekend! 

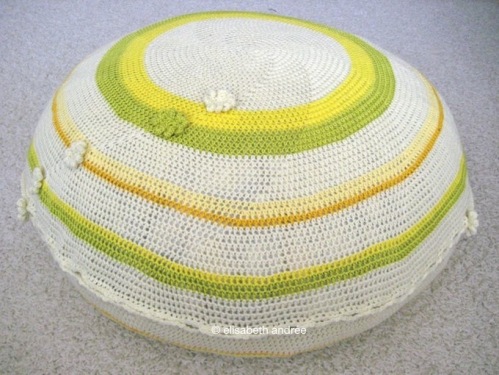
here are some pictures of the bright colored crochet nutty pillow that i started september last year, more info here. this week i finally completed the project. it is made entirely of leftover yarn.

inside is a pillow made from an old duvet cover filled with leftover yarn, yarn ends and leftover crochet projects. i measured to find the middle on both sides and pulled needle and yarn through.

the crochet cushion cover i washed and after it was dried, i have put the sewed cushion in it and i could easily pull the yarn on both sides through the center and attach the buttons, then i sewed the edge.

the nutty pillow is a large floor cushion of almost 90 cm in diameter, it feels like a comfortable mattrass and i designed it for two cats to relax and sleep on it. i hope they like the neon details!

Have a lovely weekend and until next time!


30 Comments

work in progress: the crochet nutty pillow

nice to see you!

with a lot of short and longer pieces of leftover yarn i’ve made ​​yarn balls, crazy yarn balls, to make another cushion for a dog or cat (i think). the ball on the first picture i already had for a while.


the pieces of yarn i knotted together, and normally that’s something i never do. the knots you can see and feel and they are not secure as weaving in yarn ends is.

but i did it anyway because some pieces of yarn were so short and i did not feel for other methods to join the yarn ends.


with these ball i crochet the nutty pillow:)

it’s a really fun project to work on because the nature of it is changing with every color you add. occasionally i crocheted a few rows of white yarn (also leftover from another project) between rows to freshen up the whole.

at the moment i’m working on the edge with bright pink yarn of which i found an almost complete ball in a bag with leftovers. then i will sew a fabric cover to fill with more leftover yarn and yarn ends, to put in the crochet nutty pillow. but i have no time for that the coming days, so that’s a job for next week.


joining:


until next time!


16 Comments

crochet a different shape

thanks for stopping by!


the photo of these pillows i saw on etsy and i pinned here.

Vintage Crochet Pattern PDF 257 Triangular Cushion Pillows

the shape of the pillows is unusual and i think it is created by attaching two diamond shapes together. the pattern is for sale on etsy.


i wanted to make a similar shape without increasing or decreasing the number of stitches and with only one side to close by sewing or crochet. of course you always have the points where rows begin and end unless you work in a spiral. 


while looking for information i found and pinned a tutorial for sewing whimsical pillows and how to make a pyramid sachet.


suddenly i remembered that i had pinned a picture of similar shaped toys that a blogger had made ​​for her dogs.

Colorful Pyramid Toys by Lazy Earthlings

on her blog she explains how she has made the little pyramids. she has no crochet pattern, but actually you do not need one,  just look at her drawing and photographs here


testing

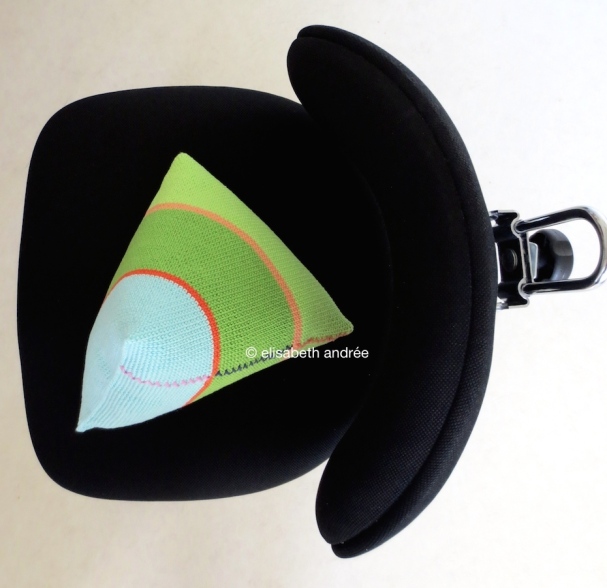
i started a test project on basis of her information and this is the result: 

crochet pyramid shape on side table


it is very easy to do and if you’re like to make a liner you can use your crochet work – before you close it –  as a template on the fabric. 

my pyramid is about 24-25 cm (width and heigth) and i have crochet very tight to create a solid fabric. then i stuffed it with white acrylic yarn. 

the end result is very nice – if i may say so myself – and this size is very suitable for a small child to play and cuddle with or it can be a stylish object in an interior depending on the colors. it is washable, the outside is cotton (phil coton 3 and catania yarn) and the stuffing is acrylic (dries quickly). 

once i have some time i will make a pillow with a mature size, but with different crochet stitches and type of yarn and with a lining. 


below are a few pictures. 

i’m curious what you think.

hope to see you soon!


crochet pyramid shape 


10 Comments

striped pillow

welcome!

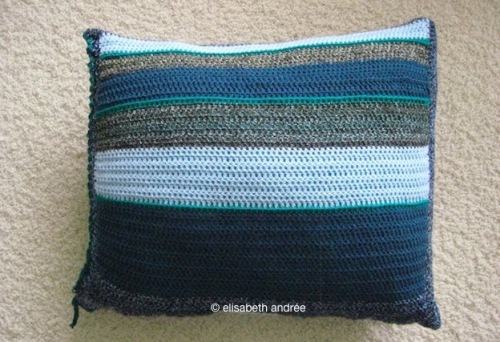
this week i made a project that i had not really planned. of a male acquaintance i got compliments on my crocheting but he also felt that my creations are very feminine. partly, i agree with him, partly not. i could not resist and have crocheted a pillow which i think the color combination will appeal to a more masculine taste.

what is your opinion?
Stripy_pillow_9905
Stripy_pillow_9908

anyway, it’s not for me, i have the pillow wrapped up and sent to one of my brothers. if the post cooperates, he will receive it today.

wish you a nice weekend!
Stripy_pillow_9909Stripy_pillow_9891Stripy_pillow_9903Stripy_pillow_9901


11 Comments

crocheting rounds tutorial part 2

Img_7654

intro

  • this method (i do not pretend that i have invented it) i have tested with thicker and thinner yarn and both types of yarn create a flat circle. if you’re working with a thicker yarn then your work – i think – will remains flat too, but if not so, start the circle with 6 half double crochets instead of 8.
  • the circle can be used for making a rug, a bag or basket or like i do for a pouf and a large floor cushion.
  • this is not a pattern, but more an attempt to explain how i work when i crochet in circles.

.

the pouf  

Pouf_7440
used stitches (american english)
  • ch = chain
  • ss = slip stitch
  • sc = single crochet
  • h dc = half double crochet 
used materials 
  • drops cotton light
    60% cotton – 40% acrylic
    50 g = approx 110 m
  • crochet hook size 4 mm 
colors and amount
  • lightest color  – 6 balls
  • second color  – 3
  • third color      – 3
  • dark blue       – 3
  • black            – 3
how to start
  1. make 2 chain
  2. make 8 h dc in second chain from hook
  3. tighten loop
  4. close row with a ss in the first h dc
  5. make 1 chain
work the next rows as follows 
  • first row – 8 stitches
  • second row – 16 
  • third row – 24 – 1 stitch between the groups of two stitches
  • fourth row – 32 – 2 stitches between the groups of two stitches
  • fifth row – 40 – 3 stitches between the groups of two stitches
  • sixth row – 48 – 4 stitches between the groups of two stitches
  • and further
  • the first place you increase is into the first half double crochet of each a row by making 2 h dc in 1 h dc
  • the other places where you increase are always the first stitches of the groups of two of the previous rows (see also part 1)
  • end each row with a slip stitch in the first half double crochet
  • then make a chain
  • start the next row by crocheting 2 half double crochets into the same stitch in which you have made the slip stitch 
  • forget the chain 
  • end your work with a couple of rows without increase.
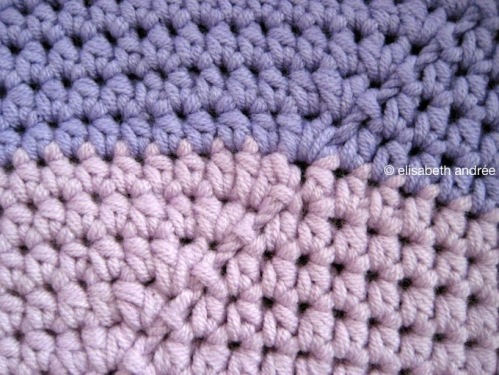
in close up the joining will look like this:
Seam_img_7590
Seam_img_7592
colors and number of stitches of the pouf
  1. for the first part crochet 35 rows in the first color, the last row of this shade has 33 stitches between the groups of 2
  2. second part in the second color: 7 rows, the last row of this shade has 40 stitches between the groups of 2
  3. third part in the third color: 7 rows, the last row of this shade has 47 stitches between the groups of 2
  4. fourth color: don’t increase but crochet three rows one stitch in each stitch of the previous row,
  5. than 1 row decrease, which is done by crocheting two h dc together on the place where you would actually increase (if you had continued to increase the last 3 rows) and 1 extra stitch back – see photo 

    Decrease_img_7640

  6.  this row creates the bend to the side of the pouf
    Bend_img_7633
  7. after this row crochet 3 other rows with one stitch in each stitch
  8. fifth color: 7 rows one stitch in each stitch of the previous row
  9. make the other side of the pouf in the same manner
  10. my pouf has a diameter of about 72 cm and is about 14 cm high.

.

filling and buttons
Img_7647

the two parts of the pouf i finished. what i have to do next is crochet the two parts together, make a part with buttonholes and sewing on the buttons. i ordered bean bag filling (polystyrene) and after sewing an inner cushion, i can fill it and put it into the pouf. that is what i am working on.

the result i post another time.

yellow floor cushion

Gele_poef_img_7905
used materials

for the large yellow floor cushion i have used regular and mercerized cotton from my stash. both yarns are suitable for hook size 2.5 to 3.5 mm, i used hook size 4 mm. as a result, the cover is quite stretchable.

size

if you like to make a similar pillow, just follow the same method of making rows and increasing until the cushion has the size you like. i did 47 rows, but this time i did not crochet rows without increase or rows in which i have decreased the number of stitches. the cushion cover has a diameter of about 67 cm.

attaching

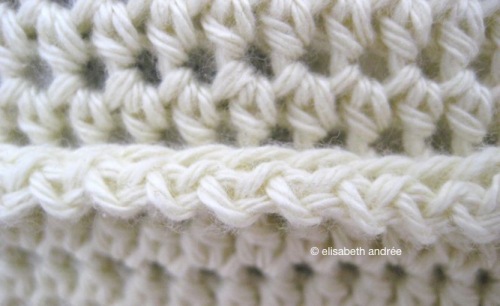
with the wrongs sides facing each other, i have both parts crocheted together with a row of half double crochets, but i have left a space large enough for a pillow to put through. along one edge of the opening i also made a row of half double crochets.

button holes
Img_7644
Img_7898
Img_7904
  • on the other side of the opening i made ​​button holes by alternating half double crochets with chains and skipping two stitches. this you need to divide equally.
  • i started with 2 h dc, *2 ch, skip 2 stitches, 4 h dc* repeat between * * and ended with 2 h dc. 
edge
then i crocheted along all edges of the cover alternate 1 ch, 1 ss in every stitch and then tied off. and i have sewn the buttons on.
Img_7895
Img_7659
stuffing
first i wanted to fill the cushion with the stuffing of a spare pillow that i had in the closet and to make a lining, but i finally decided to buy a ready made one. because of the model my floor cushion has therefore more the shape of a pouf. i do not know whether i love it. another possibility to fill the floor cushion is cutting circles out of an old duvet. time will tell.
 

the gerry flower

the cushion cover i have embellished with a few gerry flowers. the tutorial for these flowers you will find in a separate post very soon.
Img_7901
Flower_img_7887
Img_7902
UPDATE!

.

my floor cushion is ready!
for more info about crocheting rounds/circles: see also part 1 of the tutorial
Gele_poef_img_7880
Gele_poef_img_7884
Img_7907
Img_7908
Img_7892
.